Dara Home Studio: MIXING

Most Popular Tags: Action adventure blu-ray book childrens books christianity comedy drama dvd erotic romance erotica family fantasy fiction games gift idea health historical fiction historical romance history horror humor inspirational kids kindle kindle book kindle freebie music mystery paranormal paranormal romance photography playstation 3 science fiction self-help sex spirituality suspense video games wii women xbox 360 young adult...etc
Showing posts with label MIXING. Show all posts

THE WET/DRY/WET TRICK (a guide for dummies)


Hello and welcome to this week's tutorial! Today we're going to talk about an interesting technique used by some famous producer, which can be easily replied on our DAW, and that allows us to apply an effect on a track, mantaining all the clarity and the transient of the original sound.
The Wet/Dry/Wet trick it's a variation of the Parallel Processing system (also known as the New York Trick), but the Parallel processing is used mainly for Compression, while this technique is more suited to effect a track with a Delay or similar effects, and it's best suited for a central guitar (such a Lead Guitar), for a Snare Drum or for Vocals

How does it work? 
We have to create TWO mono FX Tracks, (instead of just one, as it happens with Parallel Processing), and to Pan them as much as you want in the stereo field, one left and one right (that's why we need a central instrument).
Now we must load on these two tracks the same effect, for example a Delay and select the amount of effect to be fed on the fx send of out track on a pretty low level: it has to be heard but it must not completely cover our original sound; Equalize the effect track, if needed, to select the frequency range to affect: usually the area that benefits most of Delay is the one that goes from 150hz to 2000hz, if we effect too much the low end, it's gonna become muddy and resonant.

Now comes into play the reason why we created two tracks instead of one: we're going to apply different settings on the two Delays.
This really goes according to the taste, but if they're tempo synced we can for example switch the rhythm of one of them into a polyrhythm (e.g. 5/4), or we can set one delay on quarter notes and one on eight notes, and so on. 
Once we have achieved a thick, interesting double layer of delay, it's time to regulate the right amount of effect to feed to our track: remember that our aim is to keep the original dry sound loud and clear and just to apply, underneath, the effect tail, to give it that cutting through, professional, non-soaked effected feel that can be heard on the best productions. 

Hope this was useful :)

Become fan of this blog on Facebook! Share it and contact us to collaborate!!

HOW TO MIX A GOOD ROCK / METAL GUITAR! PART 2/2


CLICK HERE FOR THE PART 1/2 OF THIS TUTORIAL!

Hello! On the first part of this tutorial we've seen how to acquire the guitar signal and how to Equalize it, this time we're going to analyze the remaining steps to mix it: Compression / Multiband Compression, Tube Saturation / Frequency Excitement / Virtual Console Emulation, Panning.
Let's start from the first step:

Compression (click here for a dedicated article): this is the first thing check after eqing, and it's crucial:  since gain is a natural compressor, it will already flatten most of the dynamics, so our first aim will be mainly to tame the lows; without compression, in facts, a palm muting will generate high peaks in volume, so we're going to compress in order to cut these peaks leaving the rest of the wave untouched.
The ratio depends on if we're already using a Mix Buss Compression unit on our stereo buss or not (the more compressors are stacked on a sound, the less aggressive should be the settings of each one), but we can start with a ratio as low as 4:1, with an attack as fast as possible ad a release of around 0.50ms, and just pull down the gain reduction until palm muted parts and open parts sounds even. If we push the compression further from this point, the result will sound increasingly harsh and fizzy (avoid it).
Eventually someone even suggest to use a Limiter instead of a compressor, just to keep the lows down, in the same manner we'd use a broadband Compressor, but being even more careful not to process anything else than the palm muting spikes.
In order to have a more focused compression on the lower area avoiding to accidentally ruin the general sound, we may also consider Multiband Compresion: there is a specific setting suggested only to tame the lows on high gain guitar leaving the rest of the spectrum untouched, shared by the famous producer Andy Sneap, which can be seen HERE.

Tube Saturation / Frequency Excitement / Virtual Console Emulation: these three are alternative solutions; using more than one of them on the same sound will result in a screaming mess, and all of them are optional: they are rarely essential, but sometimes their sligh boosting on the mid-high frequencies will be just the thing we need to add some presence on an excessively flat sound, and they will generally sound better than just boosting the eq.
Let's talk briefly about them, ordered by an increasing effect on the final sound:
Virtual Console Emulation (click here for a dedicated article) adds a sligh colour to the sound, usually pushing it towards the midrange and a gentle compression and saturation, and sometimes these plugins can improve a little the sound just being loaded on the buss. This kind of plugin shares the same logic used on Virtual Channel Strips, which also can be used to colour the sound, and are commonly found on many professional Guitar Busses.
Tube / Tape Saturation (click here for a dedicated article): the natural saturation / compression effect provided by adding some saturation on a Guitar buss will often make the sound smoother, fatter and more controlled, rather than using straight compression and eq, just beware not to overdo, or the excess of gain and harmonics will result in an unpleasant, fizzy sound.
Harmonic Exciters (click here for a dedicated article): I suggest to use these ones only if there is no other way to make the guitar sound to cut through the mix, since usually these processors tend to change the sound in a very aggressive way, adding harmonics on certain areas of the spectrum. My suggestion is to use it only on the high end of the sound, and to not process the low end, otherwise we'll find our guitar sound full of ultra-low frequencies that will only harm the low end of our mix. We can start with a plugin like the free X-Cita, setting the Low Contour control to zero, and raising the Hi Contour knob to taste, until the guitar starts to gain presence, being VERY aware not to overdo!

- Panning (click here for a dedicated article): once we are satisfied with our sound, it's time to record 2 or 4 instances of our guitar, in order to create a wall of sound: with four takes the sound will obviously be thicker than with two, but sometimes a mix with four guitars leaves very few room for the other instruments, so if we have a busy mix it's better to try with just 2 tracks.
If we have two tracks the idea is to set them wide, 90% left and 90% right, or straight full left and full right.
If we have four tracks, we can set two of them at the extreme left and right, the other 2 can be set 70% left and 70% right, and we can also experiment a different sound for these two, or a different eq, to make the sound more rich and various.
Notice: when recording two or four tracks, we'll have to record 2 or 4 different takes, because if we just copy the same take on the other tracks, the only result will be an increase in volume.

So Here's our Chain: Signal -> Subtractive Eq -> Compression ->(Tube Saturation / Harmonic Exciter / Virtual Console Saturation)-> Panning

I hope this was helpful! If you have a different method of guitar mixing, share it with us!

CLICK HERE FOR THE PART 1/2 OF THIS TUTORIAL!

Become fan of this blog on Facebook! Share it and contact us to collaborate!!

HOW TO MIX A GOOD ROCK / METAL GUITAR! PART 1/2


Hello and welcome to this week's article!
Today we're going to talk about a long-waited topic: how to mix a hi-gain guitar.
First off we must have the tracks already recorded on our computer with a sound that is already good enough, and to do this we have different methods already covered on other articles:

- By Microphoning an Amplifier

- By using a hardware Guitar Amp Simulator

- By using Vst Plugins

I've said "a sound that is already good enough" because the mixing process can enhance dramatically an existing sound, but it cannot completely transform a sound at the point to turn a lead into gold, so we're going to have excellent results only if the original sound is already good; if it's not good, don't settle, record again using another method until you're completely satisfied.

Execution is very important, as mixing can't do much about a poorly executed track, but after the recording phase, and before starting mixing, there is one last phase: Editing (Click Here for the full article), which is the phase where we adjust the tracks in order to, for example, correct the small timing discrepancies in the execution of a double tracked guitar, to make it sound more tight.

After we have accomplished all these preliminary tasks, we should have our guitar tracks nice and ready to be processed, being aware that guitars do accept processing pretty poorly: the more we will process them and set them afar from the original sound, the worse the final result will be, so we're gonna have to be smart and do as few moves as possible to enhance the sound just the right amount to make it perfect.
If we have two or four guitar tracks Panned left and right on our stereo field, we might consider to create a Stereo Group Channel track where to route all guitar tracks in order to apply the same processing to all of them without consuming too much CPU resources.

High Pass and Low Pass: first off we need to filter off the unneeded frequencies from our track, in order to carve in the spectrum a frequency range that will be reserved for the body of our guitars: we can start with a High Pass filter that takes out anything below 50hz, to leave room for the Bass, but if we feel that there is still some resonance or unwanted frequency that we can cut, we can go as far as 120hz without harming excessively our sound.
Then we must use a Low Pass filter (this step is even more important than the High Pass one), to shave off the frequencies until 12khz, but if we feel that there is still some "mosquito-like" frequency, we can go as far as 7,1 khz, leaving more room for cymbals and vocals.

Equalization - the guitar sound is a very unique combination of different elements: the execution, the wood, the pickups, string gauge, the recording method used and so on, therefore it's going to be very hard to record a track that will exactly match the sound of our favourite referencing track; the best we can do is to try to use a similar gear, but my advice is to do referencing and comparations farther in the mixing phase, in order to adjust the overall balance, and just try to get the best result possible from our base sound in this phase, since if we will try to completely distort our base sound to match a totally different one, we will end up with a disaster.

To get the best from our own sound we need a good pair of monitors and/or headphones, and a spectrum analizer: we can start taking down the peaks on the 100hz to 300hz area, since they are resonances created from the cab (real or simulated), which are unneeden and may even become harmful for our final sound;
then we should check on the area between 200hz and 500hz, which is the area where the aforementioned resonances are generated in smaller rooms, or by mid-focused guitar amps: if there are peaks or resonances here, we should lower them down of some db.
The next area is the "cardboard zone" between 500hz and 800hz: this is the area that is classically cut to create the famous "scooped sound" loved by metal players, but beware: to cut a few decibel will increase clarity and character, but if we scoop too much we will end up with a sound without body and "meat" (which is bad).
The 2khz to 4khz is the so-called Vocal Area, which is also the area our ears are tuned to hear better: if we boost the guitar here it is going to be heard more, but we should find, via the frequency analysis, the main Vocals frequency region and create some room, poking on our guitar Eq some db in the relative area, since the singer is the element in the mix that should never be obscured by the other instruments.
In conclusion it is vital here to find a compromise between making the Vocals to cut through and avoiding the "chug chug" of our guitars to disappear completely.
The last eq area is the residual part between 4hz and the frequency where the low pass filter kicks in: here we should sweep with the eq, boosting around until we find any possible "fizz" area that we can lower of some db: this area will vary according to the equipment used, but it can harm our mix, therefore it's a good idea to check it out.

After we have seen the theory behind each Eq region that may affect a Hi Gain guitar, here is a screenshot of a typical generic eq that may go on a hi-gain guitar buss, BEFORE sweeping to find the exact notches of resonances and fizzes to pin down, operation that is often done by adding a second Eq processor after this one:


As you can see, I have inserted a high pass filter, a low pass one, and a sligh cut around the "cardboard area", but keep in mind that these numbers are good just for my own sound chain, they can be used to understand the process of guitar equalization, but you will have to find the exact frequencies to cut/boost for your sound by yourselves, otherwise if you apply these same numbers on your own tone it's very possible that they will not improve it very much :)

One last word about boosting eq: this is a tricky matter, as it can make the guitar sound harsh and fake; many producers never boost a rhythm guitar, but sometimes the sound can be so flat that there may be the vital need to increase the sound's presence. We can choose wheter to boost with the eq, to excite some frequency or to add some saturation; as we're going to see on the second part of our tutorial, all of these thee methods will increase the presence of our sound.

CLICK HERE FOR THE PART 2/2 OF THIS TUTORIAL!

Become fan of this blog on Facebook! Share it and contact us to collaborate!!

MODULATIONS PART 5: RING MODULATOR, OCTAVE, HARMONIZER! (with Free Vst Plugins Inside)


Hello and welcome to this week's article!
This is the fifth article about modulation effects, and today we're going to talk about ring modulator, octave and harmonizer!

- Ring Modulator: This effect is a sibiling of Tremolo, which, instead of having its amplitude rhitmically altered, it uses a copy of the sound itself very altered, or another sound.
Let's make an example: we put on a ring modulator two sounds: the sound of our voice and the sound of a guitar, the effect is like the guitar is "talking" to us, because the effect won't let out the single sounds, but just the "interaction" between them (e.g. Peter Frampton's "Talking Guitar").

- Octave: this one's much easier to explain, it consists into analyzing the input sound and creating a synth copy or more, one octave or more lower. This produces a deeper and more "bassy" sound, like the one that can be heard on Led Zeppelin's song "Fool in The Rain" guitar solo.
A particular type of Pitch Shifter that not only works with the octaves, but that alters the sound's pitch widely, even of many octaves, it's the Digitech Whammy pedal, often used by Rage Against the Machine guitarist Tom Morello.

- Harmonizer: this is a very particular type of pitch shifting (sometimes it's called intelligent pitch shifter), in which the effect creates a synth copy of the original sound that respects a certain harmonic distance (for example a third major, or a fifth minor...).
This effect is often used to process vocals or guitar, and it can be set at a certain scale related with the original sound, or midi-driven, and in this case it can change its scale at a pre-programmed moment. This effect is part of the trademark sound of many guitar players, from Brian May of Queen to Blind Guardian's guitarist Andrè Olbrich.

Unfortunately there are no common basic controls to analyze for these three effects, except for the Mix control, which sets the amount of original signal to leave unprocessed.
Then, according to the type of effect, we will have an octave control for the octave, a key control to set the scale on the harmonizer, and a control that will set the shape of the waveform for the Ring Modulator.
Some Octave processors for guitar also feature a Distortion control to add some growl to the processed signal.


Today some DAWs already feature some basic Octave, Harmonizer and Ring Modulation Effect, but if you want to try something new and different here's a selection of the best freeware effects available:

Ring-O - A nice, vintage looking, ring modulator

ST-Rmod - An interesting stompbox-style ring modulator

Stereo Vrek - A creative Lo-Fi delay / ring modulation effect

Ringer - A simple, easy to use ring modulator

SubGen - A stompbox-style Octave plugin

Harmonisator - A simple harmonizer plugin


Become fan of this blog on Facebook! Share it and contact us to collaborate!!
MODULATIONS PART 4: TREMOLO, VIBRATO AND ROTARY / LESLIE! (with Free Vst Plugins Inside)


Hello and welcome to Today's article! 
This week we analyze an interesting branch of modulation effects, the one more tied to the "vintage" and psychedelic sound of sixties and seventies: Tremolo, Vibrato and Rotary Speaker.

Tremolo is an effect that simulates a rhythmic opening and closure of the guitar's volume control, it can be set to different timings and it must not be confused with the Tremolo Bridge.
A good example of tremolo can be heard at the beginnig of the Nancy Sinatra's song "Bang Bang".

Vibrato, instead, is an effect that rhythmically alters the pitch of a sound, through a frequency modulation. It is easily achieved with vocals (with the singer periodically contracting its diaphragm) and string instruments, making the string to vibrate with our fingers or the whole bridge to move via the Whammy Bar, but there are also many electronic devices that can produce a similar result, and their "warbling" sound often appeared on Surf Rock or Noise Rock records. A good example of this effect may be found at the beginning of the song "Machine Gun" by Jimi Hendrix.

Rotary - Leslie: this last variation is basically an actual speaker rotating inside a box (created by Donald Leslie, thus the name), and its speed can be controlled the musician. 
The result is a phenomenon called Doppler Effect: a frequency change of the perceived wave based on the varying of the position of it source. This device was particularly used with the Hammond Organ, a true protagonist of '60s and '70s music, that can be heard on many Deep Purple songs (for example in "Living Wreck"). 


These three effects, which are quite similar as a result, have two fundamental controls in common (although by downloading some of the free Vst listed below you'll notice that there are many more parameters available):

Speed (or Rate): controls the frequency of the variation, typically from a maximum (very fast) to a minimum, which may be as slow as one cycle taking several seconds.

Depth (or Intensity): controls the amplitude (in volume or in pitch) of the variation. The minimum depth is often zero (no effect on the sound at all), while the maximum depth does not normally cut the sound off completely at the cycle minimum, but may reduce it by as much as making it inaudible.


Today many DAWs already feature some basic Tremolo, Vibrato and Rotary Effect, but if you want to try something new and different here's a selection of the best freeware effects available:

Pan-Oh-Rama - Autopan, Tremolo and Filter

Bts TremoloDelay - An Interesting Tremolo and Delay simulator

Stomp King RoTube - Tube warmed Rotary / Leslie effect

MVibrato - Traditional Vibrato with adjustable shape

MTremolo - Easy and fully automatable Tremolo

NdcTrem+ - Tempo Sync-able Tremolo effect

Mr Donald - Midi Controlled Rotary / Leslie simulator

Real Rotor - Organ - focused Rotary / Leslie effect

Effectizer - an interesting Multi Effect plugin that features Tremolo too


Become fan of this blog on Facebook! Share it and contact us to collaborate!!

MODULATIONS PART 3: DELAY AND ECHO! (with Free Vst Plugins Inside)


Hello and welcome to This week's article!
Today we're going to talk about Delays and Echos! These effects are also called Time Based Effects, because they take the first sound and repeat it continuously at a certain rate, as if you were talking inside of a cave, with the reflections of your voice coming back to you on a delayed time, summing up one another.
Although the two terms are today exchangeable since they refer to the same thing, usually with "echo" we refer to the natural phenomenon, while the delay is the implementation of that in the audio effect; 
in common language many manufacturers calls "echo" a warmer, more vintage sound,  and "delay" a crispier, more digital sounding effect. 
Delay is an effect born in the '50s by recording a sound on a tape and playing it continuously to simulate an echo (the famous "Tape Echo"), but today it is a very common tool featured on pedalboards and racks of virtually any guitar player in the world; the two guitarists that probably own more of their trademark sound to this effect are Robert Fripp of King Crimson and The Edge, from U2 (which is famous for his riffs that are often exclusively based of the layers of delay).
Delay is the basic modulation effect, from which descends almost all of the other modulations: Chorus, Flanger and Reverb are consequences of applying particular settings to a delay, but there is also another use of a extreme settings applied to this effect: the looper.
A looper is a delay which records long phrases of an instrument, up to several seconds (e.g. a guitar riff) and set them in loop, so that for example a guitar player can play a solo above that base.

The most common and specific uses for a delay are the Doubling Echo, the Ping-Pong delay and the Slapback Echo.

Doubling Echo: Is used to create a sound that feels like the original instrument has been doubled by a second one, and to do this the delay time must be very short: 10 to 50 milliseconds. 

Slapback Echo: instead is a longer delay effect (75 to 250 milliseconds), and was often used in the '50s records to underline the main vocals, and later in the '80s it's been used on synths and percussions too, to produce creative rhythmic textures.   
Today Delay is often syncronized to the metronome of our Daw, to ensure that its repetitions are perfectly in sync with the song, but if we want to make the repetitions to cut through without being overshadowed by the other rhythmic elements of the mix it's suggestable to use the same metronome but with different beats, for example triplets, or a 5/4 rhythm; the delay will still be "on the click", but the repetitions will be noticed more.

Ping-Pong Delay: a particular type of stereo delay that "bounces" the repetitions (sometimes called "Taps") from left to right, sometimes it has been used by Jimi Hendrix and Brian May from Queen, among the others. 

Here are the most common controls found on Delays and Echos:

Length (time) - The delay of the repetition in ms (thousandths of a second)

Length (musical) - The length of the repetition in beats (e.g. 1/8 note)

Feedback - How much of the delay output is fed back into the input of the effect.

Wet/Dry (sometimes these two controls are fused on a single control called "Mix")
Wet - The amount of processed signal in the output.
Dry - The amount of unprocessed signal in the output.

Lowpass filter - A filter, which filters out from the repetitions the frequencies ABOVE this value.

Hipass filter - A filter, which filters out the frequencies BELOW this value.


Today most DAWs already feature some basic Delay and Echo Effect, but if you want to try something new and different here's a selection of the best freeware Delay and Echo Vst:

Readelay, a one of the most used free delays around, very versatile and professional

Variety of Sound Nasty Dla II, an excellent Chorus and Tape Echo device

Valhalla Freq Echo a creative and easy to use delay

WatCat a very interesting replica of the vintage hardware "Custom Copicat" device

Tal Dub a vintage style delay effect

TapeDelay a very simple tape delay effect

HOW TO MIX A GUITAR SOLO (a guide for dummies)


Hello and welcome to this week's article! Today we're goint to talk abot How to Mix a Guitar solo!
Let's start off assuming that we have already recorded our solo, by Microphoning our amplifier, or using a Guitar Amp Simulator plugins, or even a Hardware Processor.
Once that our track is ready for mixing, we must keep in mind that our Lead Guitar track will share the same mid-range frequencies used by our rhythm guitars, so we must find a way to make the solo cut through while remaining "in the mix" at a volume comparable to the other intruments.
Usually the idea is to push the lead guitar part a little bit more on the mid-range than its rhythmic counterpart, just enough to make it cut through: we can treat it on a way similiar to how we mix Vocals, since usually a Solo takes the place of the voice in a song, therefore we can usually Pan it to the centre of the soundstage, unless we're after some particulare effect.

On the Equalization side we can usually use a wide Hi Pass filter, taking out everything from 160hz down, then (after the Compression) we can do a gentle boost on the "vocal area", somewhere between 3khz and 5khz.
It's a good idea also to cut some db on the rhythm guitars, in the same area we're boosting our solo: this will help us to cut through the mix even better (another Interesting way to cut through it's also to use a different guitar or amplifier than the one we have used for the Rhythm guitar Tracks).

On the Compression side we can use very fast attack and release times (even 10ms or less) and a low ratio, from 2:1 to 10:1 according to the amount of dynamic we want to keep, bearing in mind that the dynamic response it's a very important part of a good guitar solo, so we must not over-squash it: let's use less Compression than the amount we have used on the rhythmic side!

On the Effects chapter, it's important to say that a guitar sound is probably the one that accepts effect processing better, so we can use if we want some very subtle Reverb or some Chorus/doubler to give some thickness, but the most commonly used effect on guitar solos nowadays it's the Delay, which helps the sustain and gives to the sound a pleasant "bounce-back" feel. Some Tube Saturation or Harmonic Excitement can help the sound to cut through the mix even more.

Finally, if after all this processing we feel that our solo isn't emerging from the mix yet, our last resort is to Automate the rhythm guitar tracks to lower their volume a bit (half db or a db will usually be more than enough) in order to clear some headroom, to make our solo soar over them.

So Here's our Chain: Signal -> Subtractive Eq -> Compression -> Boosting Eq -> (Tube Saturation / Harmonic Exciter) -> Delay -> (Reverb)

Click Here if you want to learn how to Mix a Hi Gain Guitar!!

Become fan of this blog on Facebook! Share it and contact us to collaborate!!

HOW TO RECORD AND MIX DRUM CYMBALS (PART 2/2)


CLICK HERE FOR THE PART 1/2 OF THIS TUTORIAL!

Once we have seen how to acquire our cymbals sound, we sould now find ourselves with Four mono tracks: two for the Over Heads (Left and Right), one for the Hi Hat and one for the Ride, therefore now it's time to start mixing.

- Overheads: the idea is to Pan those two tracks very wide, often 100% left and 100% right, to give to our Crash Cymbals as much space as possible, then we need to Hi Pass and Low pass them, in order to give to the tracks a proper frequency range that will not make them fight with the others.
First off we should create a Group Channel track where to route the two single tracks, and then we can start off by loading on the Group Channel a Hi-Pass Filter, taking away everything below 100hz to 500hz, until we find the spot where the bulk of the drums disappears (unless we don't want purposely to retain some spill on those tracks too, to beef up the global drum sound), then we can Low-Pass around 10/12khz, to avoid the sound to become too harsh.
Now the only thing left to do is to start manually to pin down the Resonant Frequencies (which are, if we look at the Spectrum of our sound, the frequencies that produces the highest and most annoying peaks), and see if our cymbals are Eq Masking the frequencies of other important tracks (Vocals, for example).
If this happens, it's a good idea to scoop a bit around the 3/4khz area to clear some room for Vocals, and if needed we can also take away something around the 500hz area too, to eliminate a bit of "Room Mud".
The last thing to do, if needed, is to Compress the sound just a little, in order to soften a bit the hardest hits.

- Hi Hat: This cymbal is seen more as a part of the snare sound than an ambient cymbal, and therefore shouldn't be Panned too far from the snare: someone sets it straghit to the centre of the soundstage, someone else pans it slightly to the left (about 12.5 left), as if it's heard from the drummer's perspective.
We can Low-Pass the sound, as for the others cymbals, until most of the snare goes away (300 to 500hz, usually) and then Hi-Pass it at about 10khz, eventually taking out some other frequency if the general sound feels a bit "gongy". To add some brilliance we can boost a little around 6khz.

- Ride Cymbal: this cymbal should be Panned usually somewhere on the right area (like 12,5 right), and its particularity, compared with the Hi Hat, is a usually stronger low end. In order to make the ride sound brighter we can Hi Pass the sound to about 3/500hz, then we can boost a couple of dbs at about 10/12khz to add some air and sparkle. Watch out for resonances on this track too!
Similarly to the Hi Hat, if we feel that there are some frequencies that are fighting with the Vocals ones, we can scoop around 3khz.

We can also route the Hi Hat and the Ride Cymbal on another Group Channel Track to add a little bit of Compression, just to peel off some of the peaks.

Very important: If we're using Compression (and usually it is suggested for hard rock songs, up to the most extreme metal, not for softer genres), we must keep in mind that the settings should be very very low, since it's really easy to create an unnatural effect with cymbals! Same is for Reverb: usually it's not suggested, but in some cases, when the overall drum sound is very dull and lifeless, if we use a Plate Reverb on "homeopathic doses", it can add some body and room to the general sound.


Become fan of this blog on Facebook! Share it and contact us to collaborate!!

HOW TO RECORD AND MIX DRUM CYMBALS (PART 1/2)

Pic. 1

Hello and welcome to this week's article! Today we will talk about How to Record Cymbals!
There are many ways to record Cymbals, and the technique has evolved greatly throughout the time: from the early recordings, at the beginning of the 20th century, with nothing but a condenser microphone in the middle of the room to catch the sound produced by the whole band, to the most complex combinations of close miking of any single drum piece with other microphones to take care of the global room sound. 
The technique we're going to show you today it's a compromise between the need to capture the life of the recording room and the flexibility of having two single tracks for Hi Hat and Ride.
This technique can be successfully used with a natural drumset as well as with a triggered one (or a drum with its signal Replaced), although with a triggered drumset, if properly muted, is even better: we will have "clean" cymbal tracks, reducing to the minimum any unwanted mic bleed from other drum parts, and this will help us greatly during the Editing Phase.
Some musician even prefer to record cymbals without using the drumset at all, using just the cymbals and their stands, microphoned: the drummer plays the cymbals as he would do using a drumset, following the song on his headphones. This method may feel a bit unnatural, but it's the "cleanest" way to record the cymbals signal with zero bleed from the drumset :)

Let's start talking about Overhead Cymbals (Crash, China, Splash...): these are the cymbals that are positioned above the drumset, and their sound can be captured with a couple of overhead microphones (Pic. 1), which can be dynamic, but it's very suggested to use Condenser Microphones (e.g. for our recording we have used a pair of Akg C1000), since they can capture many more details. They can be positioned with the X/Y method, as shown in Pic. 1, creating a 90° angle to one another, at around 3 or 4 feet of height (1-1.20 meter) from the drumset. This setup is good to record the whole drumset / cymbals area providing phase coherence (therefore less frequency cancellation). 
There are other methods too, if you want to try, as for example positioning the two microphones at the same height but on the left and right side of the drumset, pointing towards the center of the set, and this method is used to add a sense of width to the recording.


Pic. 2

Now let's talk about the Hi-Hat (also known as "Charleston"): this cymbal actually consists of two cymbals that are mounted on a stand, one on top of the other, and a pedal which can be used to clash and hold the cymbals together. This cymbal can be close-microphoned, since it's a very important part of a drum sound, complementary to the snare. We need to process it alone, if possible, so the Hi-Hat can be microphoned with a dynamic microphone, such a Shure Sm57 as shown on Pic 2, on the upper side of the Cymbal, at a distance of a couple of inches, at the opposite side of the Snare, in order to catch as less snare sound as possible. 


Pic. 3

The Ride cymbal is another important drum part, with a function similiar and alternative to the Hi-Hat, so it's suggested to record it with another dedicated microphone, which can be a dynamic one as well, but this time the right positioning is Below it, at about 2 inches of distance (Pic. 3), in order  to catch less bleed from the other drum parts.

These four microphones must be connected to four Microphone Preamplifiers, therefore we will need an Audio Interface with at least four Mic Preamps, or an external Mic Preamp / Mixer to be connected to our Audio Interface on a way that lets us stream the sound of each single microphone on a different track.

Ps. Thanks to Francesco Paoli and Cristiano Trionfera from Fleshgod Apocalypse for their help on recording the drums of my band! ;)

CLICK HERE FOR THE PART 2/2 OF THIS TUTORIAL!

Become fan of this blog on Facebook! Share it and contact us to collaborate!!

HOW TO USE VIRTUAL CONSOLE EMULATIONS (with Free Vst Plugins Inside)


Hello and welcome to this week's article! Today we're going to talk about Virtual Console Emulation!
This article talks about a particular kind of plugin set between a Saturation Plugin, an Harmonic Exciter, a Mix Buss Compressor and an Equalizer. Looks complicated? It's actually easier than it seems, in facts, like we've already seen with our Virtual Channel Strips article, it's just all about recreating a sound that feels a bit less digital, and a little more like the vintage albums. 
Back in the day, in facts, recordings were done analogically, by processing the sound through huge and expensive consoles that, just by passing the signal through them, used to give to the wave a particular colouration, and this colouration, featured on some classic, timeless album, is still today sought after from many sound engineers.
This "Colouration" of the sound consisted basically in some characteristic of the electronic components used for the console, and at the beginning they were meant to be as transparent and hi-fi as possible, but nevertheless the sound was inevitably modified by passing through them to the point that, once a real hi-fi and true-to-the-source recording has been possible, the engineers felt something was missing.
When the Drive knob is raised, those Virtual Console Emulators basically works halfaway between a Harmonic Exciter and a Saturator, so they add a bit of gain and a sligh compression too, and the hi-pass and low-pass filter tries to set the sound on the coords of the ones created with the virtual consoles. 
Some of these plugins works as a Summing processor too: a summing processor is a tool that is used to sum together the tracks, not only by stacking and exporting them on a single file, but  
adding a slightly 'bigger' and more professional sound, although this is the source of much debate in the pro audio world, since always more audio engineers are sticking with the "In the box" solution without problems.

Here are the best Console Emulation plugins, ordered by price:

- Terry West's Saturn Console emulation: A Free console emulator for single channels or busses with fixed Hi-Pass and Low Pass filters, a warm gain-driven saturator with a option to use the fine US-pre gain compressor and two meters.

- Sonimus Satson: another good console saturation plugin, at an excellent pricing, with adjustable hi-pass and low-pass filter and gain control.

- SKnote Stripbus: Four types of console emulation, hi pass and low pass filter, VU meters, stereo buss compression and a very low price.

- Waves Nls: Three different console simulations (Neve, SSL, EMI), which will add different tonal colourations to your single instrument or mix buss and work as Summer.

- Slate VCC: another console emulation that features 5 classic console models, and features summing capabilities.

- Acustica Audio Nebula: an impressive virtual console emulator

Become fan of this blog on Facebook! Share it and contact us to collaborate!!

HOW TO USE NOISEGATES (with Free Vst Plugins Inside!)


Hello and welcome to this week's article! Today we're going to talk about Noise Gates!
When we record an audio from a souce, a microphone or straight with the jack into the audio interface, we may have some unwanted noise, generated for example by the hum of the pickups (especially the single coil ones), the quality of the cable, and every other ring on the chain that brings the sound into the Daw.

Let's start by saying that there are different types of "noise": Hiss (which are the frequencies that produces sibilance), Hum (which is the low background noise), Clicks and Crackles (which are the snappy sounds sometimes presents when digitizing vynil recordings, or when a source goes into peak, distorting the signal) and the Ess frequencies, produces by the sibilance of the human voice.
The noisegate usually works by selecting the typical frequencies that we want to remove (for example the hiss frequencies, in the case of the DeHisser), and once they occour, heavily compressing them, lowering their level to silence. 
So we're talking about plugins that are both Equalizers and Gates (a Gate is a Compressor that works on the opposite way: when a signal is below a certain threshold, instead of boosting it, it brings it down to zero decibel).
Also Gates are used when recording an acoustic drumset, to remove unwanted bleed of other drum parts on a microphone (e.g. to remove the snare sound from the kick microphone).

Many commercial noisegates (like Waves, Sonnox or Izotope) features a "Learn" function: you play a part of the track where only the noise you want to remove is hearing, and the program will remove it from the whole track leaving the other frequencies untouched. This function is featured by some free plugin too, as you can see on the list below.

Focusing on guitar sound, the main issue here is the low background noise, or Hum, generated by the pickups and sometimes by the cable too. We need to clean the sound before entering in the amplifier, or, especially if we use the distorted channel, the noise will be distorted and amplified too, resulting in a strong hum and feedback.
If we are recording an amplifier by Microphoning it, we must use a Hum remover OR just manually cut away the silence parts that feature only noise, retaining the full harmonic richness of the played parts.
If we are recording straight to the interface using Virtual Amp Simulators, instead, we can use a Noisegate BEFORE the virtual amp, and before the eventual virtual Overdrive that boosts the amp.
Many DAWs today features a bundled Noisegate that eliminates the hum, but if your bundled noisegate is not good enough or if it's completely absent, here's a selection of the best free Noisegates:

FRETTED SYNTH GATE PLUS - a Noisegate with all the features of a Compressor.

GVST GGATE - One of the most used ones, very simple.

7AMP NOISE GATE - One knob gate with Learn function: you simple hold your guitar strings for a second, or keep your microphone in silence, allowing the plugin to study noise pattern, then you set filtering level.

REAGATE - the free Gate from the Reaper Daw

FLOORFISH - A versatile multi-purpose Gate, with Learn function.

- How to use a Noisegate to remove unwanted background noise or microphone bleed: Let's load a noisegate on the track we wish to "De-Noise", and set the Threshold control wery low, so that no signal is below it, and therefore there is no gating. 
Now raise the Threshold control until only the hum is gated, and adjust the attack and release control in order to decide how fast the Gate should kick in, and for how long it should be active. It's as simple as that, just remember, when you use it to clean up your guitar tone, to adjust it with your distortion on, or the hum will be almost inaudible.

Become fan of this blog on Facebook! Share it and contact us to collaborate!!

THE BEST FREE VST GUITAR AMPS (a guide with free Vst plugins inside)


Hello and welcome to this week's article! Today we're going to talk about a long awaited topic: the best free guitar amp simulators, which ones are, where to find them, how to use them :)
First off let's put it this way: the last ten years have seen a very fast acceleration towards guitar amp modeling, with the release of increasingly accurate softwares that recreates hardware circuts, both solid state or Tube driven, that tries to recreate the final result in terms of sound. This effort to bring hardware processors to the digital domain has brought to the birth of digital amp modelers, both hardware (like the Line6 Pod, that we have already covered on This article) and software.

On the software side the scene is rapidly evolving, with the release always more accurate modelers, such as Peavey Revalver, which features the proprietary license of Peavy amplifiers, or Ik Multimedia Amplitube and Native Instruments Guitar Rig, and the market is lately trying to explore the smartphone and tablet market too.
Those abovementioned products are commercial all-in one bundles that features an array of virtual amps, cabinets and stompboxes, but also in the freeware domain there is a wide range of quality software, developed by engineers that decides to share with the public domain community the results of their researches, often offering products that have absolutely nothing to envy to the commercial ones. Here are the most used:

LEPOU PLUGINS

LePou - Lecto - Mesa Boogie Dual Rectifier Clone
LePou - LeGion - An original voiced amp by LePou, very popular in the DIY Djent world
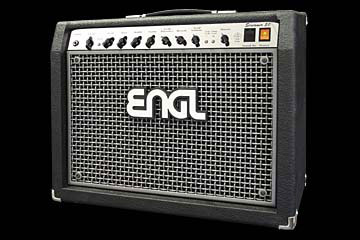
LePou - Le456 - An ENGL Powerball Amp Clone
LePou - SoloC - A Soldano SLO100 Amp Clone
LePou - Hybrit - A Marshall Superlead/JCM800 Hybrid

THE SERINA EXPERIMENT PLUGINS

TSE - X30 - Based on ENGL E530 Rack Mounted Amp Unit
TSE - X40 - A Hybrid between A Mesa Dual Rectifier and A Peavey 5150
TSE - X50 - A Peavey 5150 Clone

NICK CROW LABS

Nick Crow - 7170 Lead - A Peavey 5150 Clone
Nick Crow - 8505 Lead - A Peavey 6505 Clone

ACME BAR GIG 

AcmeBarGig - C15 - A Very High Gain Amp
AcmeBarGig - Series 60 - An Original Voice amp, is supposed to replicate a "8000 Watt Head"
AcmeBarGig - Razor - An Original Voice Amp, capable of many different tones.
AcmeBarGig - Shred - A Full guitar amp suite, featuring 6 different amp models with interchangeable tone stacks (Engl, Mesa, Marshall, Vox, Krank, Fender).

There are also many other great, free, amps available from AcmeBarGig in their "Classic Hybrid Line."

NDZEIT

NDZeit - DirtHead - Sounds like some kind of Peavey clone but with a voice control that lets you shift the voicing from American to British, similar to what Blackstar have done with the HT series. It includes a Cab sim that we'd recommend you switch off.
NDZeit - TubeBaby - Pretty basic emulation but with different amp "types" including. American, British and Custom. It includes a Cab sim that We'd recommend you switch off.

IGNITE AMPS

Ignite Amps - NRR 1 - Great Sounding High Gain 3 Channel Amp, the digital version of their actual  hardware Soldano clone
Ignite Amps - The Anvil - A VST version of the Amp designed by Andy Zeugs

- How to use these virtual amplifiers: the typical chain to use these Virtual Amp Modelers is the one we've already seen on the Basic Guitar Chain article:

NOISE SUPPRESSOR -> OVERDRIVE -> AMP SIMULATOR -> SPEAKER SIMULATOR ->EQUALIZER->COMPRESSOR.

The Noise Suppressor will clean our sound from the hum of the pickup-cable etc, then the overdrive will be needed only if we need to boost the amplifier, giving it that extra "chug" required for modern metal tones, but if we don't need a sound that edgy we can skip it.
Then we need the Speaker Simulator to recreate the cabinet sound taken from a microphone, and then an Equalizer to filter the unwanted frequencies before they become Louder due to the Compressor, whose main use is to tame the lows. Finally, if we need to boost some frequency, we can add another Equalizer after the Compressor.

Comment if you wish to suggest other Virtual Guitar Amplifiers!

Become fan of this blog on Facebook! Share it and contact us to collaborate!!

HOW TO USE VIRTUAL CHANNEL STRIPS (with Free Vst Plugins inside)


Hello and welcome to this week's article! Today we're going to talk about Channel Strips.
Today, in the DAW era, we're used to think about channel strips as a sequence of empty slots on our track, ready to be loaded with any plugin we want, of any brand we choose, on any order, but it's not always been this way: with the term Channel Strip we refer to the single channel of a hardware mixer, which includes one or more Microphone Ins,  a volume fader, an Eq section, and often other features, such a compressor/limiter, an Fx Mix control, a Noisegate, and so on.
Is it still appropriate to talk about Channel Strips today? Maybe, since the last few years we have seen an increasing interest in trying to recreate a sound that has a common colour, like all the instruments were recorded through the same gear and mixed using the same processors, in order to ease the workflow and give the sound a slighly analog and coherent style.  

Let's start immediately by saying that the software house most dedicated and professional about the recreation of Channel Strips is Waves, and one of the most famous vintage channel strip emulations is the Waves SSL, which recreates the single channel strip of a Solid State Logic Mixer, one of the most used mixers of the best studios of the last 30 years.

Beside the Waves ones, there are other Channel Strip emulations too that worth mentioning:

- De La Mancha Strip Ts, which features a Gate, A Filter, an Eq, a Compressor, a Clipper, and a Meter, and has a very good price.

- Sugar Bytes Vogue Channel Strip, another good channel strip which features almost everything: Gate, Preamp (Gain, Highpass, Overdrive), Compressor, 3-Band Dynamic Equalizer, Filter, DelayReverb.

And finally here are some free ones, some of which can rival even the most expensive ones: 

- Terry West's Cs4 and Cs12: these are 2 channel strips one with a 4 band eq dedicated to the single tracks and one with a 12 band eq for the master buss, with a wide range of features, including a Tape Saturation tool.

- Two Notes Torpedo-Pi Free: a very interesting Channel Strip dedicated to Guitars, including a Harmonic Exciter and a Cabinet Simulation tool.

- Variety Of Sound Nasty Vcs: this plugin emulates the response of a vintage console, and features a Filter, an Eq, a Compressor and a Phase Alignment tool.

- Variety of Sound PreFix: this is a very particular kind of Channel Strip, featuring a Filter, an Eq, a Compressor and a Phase alignment tool, is specifically made to take place upfront the mixing process. It provides tools set to clean-up, fix and align audio tracks concerning overall frequency correction, phase alignment, spatial stereo field corrections and routing.

Try and experiment for yourself how these tools can improve your mixing routine, as they can really add a new dimension to the sound!

Become fan of this blog on Facebook! Share it and contact us to collaborate!!

HOW TO RECOGNIZE THE FREQUENCIES (a guide for dummies)


Hello and welcome to this week's article! Today we're going to talk about How to Recognize the most important Frequencies, in order to help you having a mental reference on where to intervene while Equalizing a sound.
Obviously we will try to point out and memorize just the main areas, and once there, we will still need to sweep with a Paragraphic Equalizer to find the exact frequency that we need to boost or cut, but it's pretty important to have a mental scheme: it will improve mixing a lot and make it much faster.

We're going to analyze the various octaves that covers almost the full spectrum of audible (20hz to 20'000hz); an octave is the double of a frequency, so if we choose as our first frequence to analyze the 63hz one, the second will be 63x2=126, the third 126x2=252 and so on.

63hz: this is the area of the low thump, it will give punch to kick and bass

126hz: this is the first octave of the first frequency we analized (it's the double in hertz), and adds even more weight to the sound, especially of the bass.

252hz: the second octave of the first frequency (the double of the double), it's the "mud area", and it's often cut on guitars and snare drums to add clarity, because if it's too high it produces a "boomy" sound.

504hz: the third octave of the first frequency lies in the "cardboard area", becaused it makes the sound a bit "boxy". This is harmful for guitars, in facts this area is often widely scooped out, but adds weight to vocals and snare, and presence to the Reverb effect (that's why this area is often filtered out from the reverb Fx Tracks, because it tends to act uncontrollable). 

1008hz: the fourth octave of the first frequency creates a telephone-like sound to the voice and gives it kind of an obnoxious horn-like effect, so it's better not to boost this area.

2016hz: the fifth octave of the first frequency gives bite to the guitars and attack to the snare, but too much boosting here will cause listening fatigue.

2500-3000hz: this is not a proper octave of a precise frequency, but it's called the "vocal area", and worth a mention since it's the range our vocals usually are, and it's the range the human ear is used to pick up most. It is therefore suggested to leave room on this area to let the vocals sit, also by cutting away some db from this area on the other instruments.

4032hz: the sixth octave of the first frequency causes the hissy effect on distorted guitars, and if left untamed can lead to a seriously harsh sound.

8064hz: the seventh octave of the first frequency brings out the brilliance of a sound, and works well to bring the vocals closer to the listener, but an excess on this area can also generate too much of a fizzy sound, especially on high frequency oriented sounds, like cymbals.

16128hz: with the eight octave, we're getting close to the end of the spectrum of the human audible (usually around 20000hz). This frequency adds some more air to the sound of the most high frequency oriented instruments, but needs to be listened very closely in order to be actually heard.

Hope this was helpful!

Become fan of this blog on Facebook! Share it and contact us to collaborate!!

One Big Gadget

image

CellPhones & Accessories

A premium Android-powered smartphone, the Samsung Epic 4G Touch for Sprint may be designed to supply the best multilayered entertainment experience thanks to the superior speed and display innovation. Powered by one in the fastest processors on the market–the new 1.2 GHz dual-core Samsung Exynos, the Epic 4G Touch runs on Sprint’s ultra-fast 4G network..

image

Cameras & Photo

Die kompakte, leichte, 18 Megapixel starke EOS 600D ist eine digitale Spiegelreflexkamera mit dreh- und schwenkbarem Monitor für aufregende, interessante und kreative Aufnahmen auf unglaublich leichte Art, eine ideale Wahl für ambitionierte Hobbyfotografen, die Wert auf Bildqualität und Komfort legen. Sie bietet praktisch alles, was man für gelungene Fotos und HD-Movies braucht..

Find the best Gadget

Find the best latest tech product at One Big Gadget.

Cell phones, desktops, digital cameras, laptops, mp3 players, tv, ipod, e-book readers, camcorders, printers, software, games, car tech, speakers, remote controls, blu-ray, office gadgets, gps, watches, toys, portable devices, kindle fire...etc

Featured Section

image 3

BlackBerry PlayBook Tablet

Freu dich auf das erste professionelle Tablet der Welt. Das BlackBerry® PlayBook™ bietet dir ein Tablet-Erlebnis ohne Kompromisse. Multitasking, megaschnell, Flash-fähig und extrem handlich. Dein BlackBerry® Smartphone kannst du über BlackBerry® Bridge™ bequem mit dem Tablet verbinden und über den hochauflösenden Bildschirm kannst du sicher auf E-Mail, BBM™, Kalender, Adressbuch und weitere Funktionen zugreifen. Entscheide dich für das Tablet, das alles kann – und noch mehr...