Dara Home Studio: BASS

Most Popular Tags: Action adventure blu-ray book childrens books christianity comedy drama dvd erotic romance erotica family fantasy fiction games gift idea health historical fiction historical romance history horror humor inspirational kids kindle kindle book kindle freebie music mystery paranormal paranormal romance photography playstation 3 science fiction self-help sex spirituality suspense video games wii women xbox 360 young adult...etc
Showing posts with label BASS. Show all posts

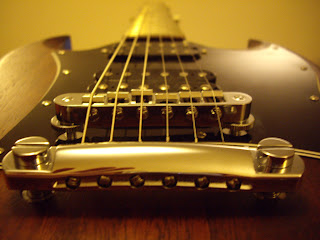
THE ELECTRIC GUITAR AND BASS BRIDGES: FIXED BRIDGES


Hello and welcome to this week's article! 
Today we're going to talk about Guitar and Bass Non-Tremolo bridges, commonly knows as Fixed Bridges (Click Here for an article dedicated to Tremolo and Floyd Rose Bridges).
The general rule is that fixed bridges offers a better transmission of the sound from the strings to the body, due to the direct contact of the part to the wood, and this improves sustain and stability.
The fixed bridge is screwed directly to the guitar body, and it obviously blocks completely any longitudinal string movement, assuring the best tuning stability.
There are no springs on the body, therefore there is not even the cavity to accomodate them, and this also increases the sound resonance, if the Wood used is good.

Let's start off by saying that a fixed bridge is, especially on entry level guitars, the best way to ensure a proper tuning, even with non-exceptional machine heads, but it's also important its role in keeping stable the pitch of the strings while we are performing a bending, since on tremolo bridges, if we bend a string, the five remaining will slighly lower their tuning for the time of the bending (and this can be noticed if we accidentally play a second string while bending one).
The downside of fixed bridges is easy to spot: being fixed they are limiting to the expressivity of the guitar: with a Tremolo bridge are achievable many more sounds than the ones we can obtain with a fixed one.

Today there are many fixed bridge models on the market, since they are easier to create and produce, so many manufacturers through the years came out with their own interpretation of the subject. 
We will analize the six most common and distinctive models:

Gibson Tune o'Matic: this is probably the most common fixed bridge used, and was introduced by Gibson in 1954. The bridge (also known as Stoptail) consists in two parts: the Tune o'Matic itself, which is a metallic bar that contains a saddle for each string, which can be adjusted to reach the perfect octave intonation according to the guitar's tuning, and a second bar called Tailpiece, which is the headlong of the strings: strings are inserted here, passed through the saddles and then fasten to the guitar's headstock. It's important to say that on the original Tune o' Matic bridge the saddles were not adjustable, this feature appeared only on the bridge's second version: the Modern Tune o'Matic.

Ibanez Gibraltar: this is an interesting bridge that had many different models on its story: Gibraltar Standard, Gibraltar plus, Gibraltar III and so on, but basically it's not too different from a Gibson's Tune o'Matic: there are saddles adjustable for the intonation, but also for their height (affecting the height of the strings on the fretboard), and in some model this bridge also have the strings running through the body (see Strings through body bridge). Gibraltar bridges are also featured on Ibanez Basses.

Telecaster Ashtray: this very particular kind of bridge, featured on Fender Telecaster, consists in a large metallic square surrounding the bridge pickup, and on this square, that resembles an ashtray (therefore the name) are mounted the strings. This leads to a more metallic tone than the Stratocaster's one, since the string were resonating not only on the body but also on this metallic plate, and this tone is particularly appreciated by country music players, which loves to find a far resemblance of a banjo tone on their guitar sound.

Strings through body bridge: this kind of bridge is used by many manufacturers (such as Ibanez or Schecter) and basically consists into mounting the tailpiece into the BACK of the guitar's body: the strings are inserted into the back of the body and emerge before the Tune o'Matic; from there they get the right intonation and are sent to the headstock. This solution is very interesting because the guitar or bass will have even more sustain, since the strings will touch the body and resonate through it. In my opinion, when possible, this is the best choice as a fixed bridge. Notice: only long scale strings can be mounted on this kind of guitar, or the string tension will be higher.

Wraparound bridge: this type of bridge is similiar to a Stoptail one, but instead of having a Tune o'Matic piece and a separated Tailpiece, it features both parts on a single metallic bar. It is featured on Paul Reed Smith guitars, and some player believes that reducing the points of contact between strings and body can improve the tone, because more string energy is transferred to the guitar body.

Evertune bridge: mounted only on Vgs guitars at the moment, this bridge is much more complex than the others: each saddle is connected to a spring on the back of the body, so that once you set the bridge to the right tuning and the right intonation, it will never get out of tune (this means that even if you bend a string the pitch won't change!!), but you can lock or unlock individually the single strings, so that it's possible to have the lower strings with a fixed tuning, and the higher strings  free to be bent.

GUITAR AND BASS FRETS AND FRETBOARDS! types and specs


Hello and welcome to this week's article!
Today we're going to talk about Frets! Frets are the raised element of a guitar or bass fretboard, and are made of pieces of a metal strip, inserted on "rails" carved directly on the fingerboard.
Frets are a creation of the first half of 18th century, since until that moment string instruments were  all "fretless", like the violin: there was no separation on the fingerboard, and the right intonation was completely up to the player's ear.
In order to make music instruments more popular even among those who didn't have a perfect ear  or didn't want to undertake an academic musical training, the luthiers started dividing the fingerboard in separated parts, each one representing a semitone, respecting the standard western system where each octave is divided in twelve semitones.
To make even easier to find the right note were also introduced Fret Marks, in order to create a viewing reference point for the player, not differently from the black and white keys on a piano.

Today there are different kinds of frets, created to meet the needs of all kinds of players.
We should choose the right type of frets according to our playing style and to how much we want to touch the fretboard when playing (someone prefers not even to touch it, and that's why Scalloped Guitars were created, click here for a dedicated article).

Here's the main type of guitar frets (dimensions may vary according to the various manufacturers, though):

- Short Frets (height: .037", width: 0.80"): were used mainly on vintage Fender guitars, and let the string really to drag into the fingerboard.

- Medium Jumbo Frets (height: .036", width: .106"): those are the standard on Gibson guitars and on many other modern guitars, and represent a good compromise between intonation, wearing and playability.

- Jumbo Frets (height: .046", width: .103"): these are the standard on modern Fender models, and are wide about the same as a Medium Jumbo, but a bit taller, to reduce the string friction on the fretboard and to ease bendings. The general rule is: the bigger the frets, the longer the sustain.

- Super Jumbo Frets (height: .058", width: .118"): this kind of frets are mounted on some Ibanez guitar, for example, and gives to the freatbord an almost Scalloped feeling, without the need to carve out the wood. These frets are chosen mainly by shredder guitarists.


And here's the various types of fretboards:

- Standard Fretboard: it's the classic fretboard, featured on 99% of guitars, with 21, 22, 24... up to 27 straight frets, with the intonation regulated mainly on the guitar bridge.


- Fanned Fretboard:  it's a particular positioning of the frets that is created to accomodate better alternative tunings and composed string gauges, without having them for example too flabby on the lower strings. It is also said to keep tuning better.


- True Temperament Fretboard: this weird fretboard is created to optimize the intonation of the guitar: when pressing on the fretboard, the frets creates a sort of inevitable bending, and by using this kind of curved frets, the "bending" leads to a more accurate precision on the note, improving also the sustain.


- Fretless Fingerboard: fretless fingerboards are using mainly on Basses, making them more similiar to a Contrabass, but are sometimes seen on Guitars too (for a while Gibson produced a serie called "Fretless Wonder", with frets so small they were almost invisible); those instruments are more suited for techniques sliding, but the fingerboard obvioulsy wears out much faster due to the stronger string friction.


Become fan of this blog on Facebook! Share it and contact us to collaborate!!

MODULATIONS PART 5: RING MODULATOR, OCTAVE, HARMONIZER! (with Free Vst Plugins Inside)


Hello and welcome to this week's article!
This is the fifth article about modulation effects, and today we're going to talk about ring modulator, octave and harmonizer!

- Ring Modulator: This effect is a sibiling of Tremolo, which, instead of having its amplitude rhitmically altered, it uses a copy of the sound itself very altered, or another sound.
Let's make an example: we put on a ring modulator two sounds: the sound of our voice and the sound of a guitar, the effect is like the guitar is "talking" to us, because the effect won't let out the single sounds, but just the "interaction" between them (e.g. Peter Frampton's "Talking Guitar").

- Octave: this one's much easier to explain, it consists into analyzing the input sound and creating a synth copy or more, one octave or more lower. This produces a deeper and more "bassy" sound, like the one that can be heard on Led Zeppelin's song "Fool in The Rain" guitar solo.
A particular type of Pitch Shifter that not only works with the octaves, but that alters the sound's pitch widely, even of many octaves, it's the Digitech Whammy pedal, often used by Rage Against the Machine guitarist Tom Morello.

- Harmonizer: this is a very particular type of pitch shifting (sometimes it's called intelligent pitch shifter), in which the effect creates a synth copy of the original sound that respects a certain harmonic distance (for example a third major, or a fifth minor...).
This effect is often used to process vocals or guitar, and it can be set at a certain scale related with the original sound, or midi-driven, and in this case it can change its scale at a pre-programmed moment. This effect is part of the trademark sound of many guitar players, from Brian May of Queen to Blind Guardian's guitarist Andrè Olbrich.

Unfortunately there are no common basic controls to analyze for these three effects, except for the Mix control, which sets the amount of original signal to leave unprocessed.
Then, according to the type of effect, we will have an octave control for the octave, a key control to set the scale on the harmonizer, and a control that will set the shape of the waveform for the Ring Modulator.
Some Octave processors for guitar also feature a Distortion control to add some growl to the processed signal.


Today some DAWs already feature some basic Octave, Harmonizer and Ring Modulation Effect, but if you want to try something new and different here's a selection of the best freeware effects available:

Ring-O - A nice, vintage looking, ring modulator

ST-Rmod - An interesting stompbox-style ring modulator

Stereo Vrek - A creative Lo-Fi delay / ring modulation effect

Ringer - A simple, easy to use ring modulator

SubGen - A stompbox-style Octave plugin

Harmonisator - A simple harmonizer plugin


Become fan of this blog on Facebook! Share it and contact us to collaborate!!

WOODS FOR GUITAR AND BASS (a guide for dummies)


Hello and welcome to this week's article! Today we're going to talk about woods!
How do the different types of wood change the sound of a guitar or a bass?
Like every string instrument, guitars and basses are all made of wood (except for some particular model), and the wood type influences the resulting sound.
The incidence of the wood on the final sound is particularly audible on acoustic instruments, since in the electric ones it's easier to mask a cheap wood with a good pickup, that is sometimes capable to transform radically a signal, yet a good wood choice can give a strong print to the final sound.

The wood type, the kind of tree used to build the body, has a big impact on the tone, but along with the type of wood it's important the amount of it (if the quality is good, the more wood = the more tone), the shape (some shapes are more likely to resonate than others), the age (more years = less moisture inside the wood = more resonance) and how the neck is jointed with the body (if the guitar is neck-through-body, the sound will resonates better and have more sustain).

We must not forget that trees are living things, therefore not all woods of the same tree specie are made equal, for example if we take two identical instruments of the same brand and made with the same wood, we can still find some tonal difference: this is because some part of the body will resonate better, others will resonate less, and on some part may be present a knot or some other natural imperfection that will stop the sound to propagate at best through the body.
If a piece of wood is perfectly flawless and properly aged, it's classified as "10-top", and its value is much higher than the other pieces, therefore it will be used to create higher level guitars (such as
the top-end Paul Reed Smith guitars).


Here are the most common woods used for Guitar and Bass body and neck:

- Mahogany: Mahogany's weight and density are similar to maple, however mahogany carries are more mellow, soft and warm tone to it, with a great sustain. Les Paul guitars, along with the vast majority of "rock guitars", are made with Honduran mahogany.

- Maple: Maple is a very popular wood for necks and fretboards. Easily identifiable because of its bright tone, characteristic grain patterns and moderate weight, it's featured on many Fender Stratocaster and Telecaster guitars. It's tonal characteristics includes durability, a good sustain with plenty of bite.

- Ash: Ash is available in two types: Northern (hard) or Swamp Ash (soft). Hard Ash is popular because of its hardness, with bright tone and long sustaining qualities.
Swamp Ash is much softer; many 50's era Fender guitars were built with this wood, which has a much warmer feel than Hard Ash. Both variations have an open grain, meaning that a lot of lacquer is required to seal the wood. Excellent for clear finishes.

- Basswood: Basswood is a very light wood - even lighter than alder. It is very soft, and should not be subjected to much abuse. This wood has a nice warm, soft tone.

- Alder: Alder is light in weight with soft tight pores like Basswood. Tonally, alder retains more of the highs that Basswood softens, but it also gives some room to the lows. This brings to a broader spectrum of tones, which leads to the perception of a little less mids than Basswood.

- Rosewood: Rosewood is one of the heaviest woods available. The sound is very warm (Indian Rosewood is even warmer and heavier than the Brazilian one), although the high end sounds are dampened. Usually Indian Rosewood is reserved for fretboards only.

- Walnut: Walnut's tone is slightly warmer than maple, although it still has good sustain. This wood can look excellent with oil finishes, and is moderately heavy, but still lighter than maple.

- Tulipwood (tulipier): it's a premium wood similiar to maple, sometimes used to make Stratocaster clones. It's lighter than mahogany but with similar tonal characteristics.


Focusing on neck and fretboard material, Maple is a common wood for necks, as it is stiff, and creates a bright tone. Rosewood and maple are used for fretboards: Rosewood creates a warm tone, but ebony, a slightly less common wood, is very heavy and creates a bright, hard attack, and has a longer durability than Rosewood.
If you are on a guitar shop you can try to lay your ear on the guitar/bass body and knock lightly over it, to hear how much it resonates: the more is the sound, the richer will be the tone, once it's plugged into an amplifier.
This is also a way to find parts that doesn't resonate: if we have to choose between two identical guitars this may be a criteria to find the best one, the one with less "dead" parts on its body (on cheaper guitars, though, these tests to understand the resonance of the wood are harder, since the manufacturers covers the wood with dense layers of lacquered paint to cover the imperfections and its cheapness).
As a general rule, though, when plugged into an amplifier, softer and less dense woods will produce more volume, less attack and less sustain while heavier and denser woods will produce more sustain and a sharper attack with less volume.

Become fan of this blog on Facebook! Share it and contact us to collaborate!!

SINGLE COIL PICKUPS! PART 2/2 (a guide for dummies)


CLICK HERE FOR THE PART 1/2 OF THIS TUTORIAL!

According to the bridge of the particular guitar, strings may have a different distance between them, thus the pickups have to set the polepieces at a certain distance between them in order to intercept the vibration at best.
Here are the most common strings spacings: when choosing a pickup take notice of your guitar's bridge or you will degrade the overall sound of your guitar:


Guitar type                                                                             1st-to-6th string distance
                  
Standard spacing
(Vintage Gibson guitars)                                                                       48 mm
                                                                   
F-spacing
(Most Fender guitars, modern Gibson, Floyd Rose bridges)            51 mm
                                                                                                         
Very close to bridge, extra pickup                                                        52.3 mm
(Roland guitar synth hex pickups)

Fender Telecaster spacing                                                                     55 mm

Steinberger Spirit GT-Pro spacing                                                          60 mm
                                                                                                                                             

The three most famous types of Single Coil Pickups are: the Gibson P90, the Telecaster Single Coil and the Stratocaster Single Coil:

Gibson P90: the most famous Gibson single coil pickup, born in the '50s, features a traditional "Soapbar" shape,  alnico bar magnets lying under the coil bobbin and two screws to adjust the distance from the strings (the closer the pickup is to the string, the more vibrations it will catch).
The result is a snappy sound typical of the single coil pickup, but with some hum problem, that over time led Gibson to focus its production mainly on Humbucker pickups.
Today, anyway, there are still many manufacturers that produces P90 pickups with hum cancelling technology, so that it's possible to achieve this typical sound without hum.

Telecaster single coils: The Fender Telecaster features two single coils: the neck one produces a mellower sound, while the bridge pickup produces an extremely twangy, sharp tone with exaggerated treble response, because the bridge pickup is mounted on a steel plate (commonly known as "Ashtray"), which gives the tone a particularly metallic character. These design elements allow musicians to emulate steel guitar sounds, making it particularly appropriate for country music, and, lately, alternative rock.

Stratocaster single coils: The Fender Stratocaster is a guitar in production by more than 50 years, and through its long life it featured any kind of pickup in the market, yet if we refer to the Stratocaster set, we think of three single coils with magnet poles of different heights to compensate the different outputs of the strings, and a 5 ways pickup selector.
The particularity of this selector is that it lets the player to choose one of the three pickups or a combination between two of them (but the output will be the one of the lowest output of the two pickups), and this helps achieving a very wide range of tones.
It's typical for a guitar player to switch often between pickups while playing, according to the tone needed, and this is typical when using Single Coil pickups, more than with Humbuckers.
The masters of the classic Stratocaster sound, among the thousands of guitar player that used these pickups, are Jimi Hendrix, Marc Knopfler, David Gilmour, The Edge and Eric Clapton.

Bass pickups are very similiar to the guitar ones and shares the same problems (in some case, such as the original Fender Musicmaster, there was no difference between the guitar and bass pickups. They were exactly the same part), and a characteristic of some model is to feature oversized polepieces, on both Single coils and Humbucker, such as in the Music Man basses.

CLICK HERE FOR THE PART 1/2 OF THIS TUTORIAL!

Become fan of this blog on Facebook! Share it and contact us to collaborate!!

SINGLE COIL PICKUPS! PART 1/2 (a guide for dummies)


Hello and welcome to this week's article! 
Today we're going to talk about guitar and bass single coil pickups!
Let's start off by saying what a pickup is: a pickup is a magnet (with a core of material such as Alnico or Ceramic), wrapped with a coil of thousands of turns of copper wire, that electromagnetically converts the vibration of the strings to an electric signal; this signal is fed to an amplifier and then sent to a speaker, which makes it audible.

The first pickups to be mounted on a guitar were created by George Beauchamp in the early '20s, and consisted of two large "U" shaped magnets and one coil, known as the "horseshoe pickup".
The pickup was mounted for some Rickenbacker lap steel guitar, these devices started to appear  on a regular guitar more than 10 years later.
The pickup (and therefore the concept of electric guitar) became popular around 1936, with a Jazz player called Charlie Christian, which featured a pickup on his hollow body guitar, a Gibson Es150, and his endorsement made this device finally famous.

The single coil Pickups were the first to be created, and consisted as we said in one coil for each pickup, that granted a certain output according to the power of the magnet and the amount of copper wrapped around it: the more the power, the more the input level from the guitar to the amplifier, therefore a fuller tone, richer, more suited for distortion.
The lesser the output, instead, the more the tone tends to be similiar to an acoustic guitar and acquires the vintage character typical of the '50s and '60s guitars.

A known issue of single coil pickups is Noise: for some reason this kind of pickup is prone to catch a hum known as "the 50/60hz hum", caused by magnetic disturbances, and this problem can become pretty annoying when turning up the amplifier gain, therefore through time many manufacturers started to research their own way to solve this problem, and the two most effective results has been the Humbucker (Click here for a dedicated article), and the active pickups (created by Emg), which can be both Humbucker or Single Coil and consists on a low output pickup passing through a battery powered internal preamp that raises the output level keeping it clean and crisp.
Other producers (such as Lace Sensor, Kinman and Fender itself with the Vintage Noiseless Pickup serie, produced around the year 2000) succeeded in creating Single Coil pickups that produced no hum, by using innovative materials and trying different winding techniques.

Hum problem is a minor problem for Bass, since this instrument is usually less distorted and less hi-frequencies oriented, yet for some music genre it's suggested anyway to use active pickups, since even bass can reach high levels of distortion.
Another interesting feature is the fact that the magnet polepieces can be set in the pickup following different criteria: one for each string as it happens most of the times, two for each string (as in the case of some Fender Precision and Jazz bass), or "lipstick" / "Rail" type, with a single pole taking the vibrations of all the strings, or just a group of them.

CLICK HERE FOR THE PART 2/2 OF THIS TUTORIAL!

Become fan of this blog on Facebook! Share it and contact us to collaborate!!

GUITAR AND BASS: WHAT IS RADIUS?


Hello and welcome to this week's article! This time we're goint to talk about Radius!
When we use the radius term, talking about guitar or bass, we're not referring to the radioactive chemical, but to how curve or flat the fretboard and the frets are.
Different roundnesses provide different playing feels, and some are better suited to particular styles than others are, but as a general rule, the flatter the radius is, the easier will be to go fast, and shred.

When we see the radius mentioned on a guitar or bass spec sheet, it is usually expressed in inches (ranging from 7.25" to 18", but there are even more extreme versions) and the higher this value gets, the flatter the fretboard will be.
The idea behind a more curvy or flat neck is based on the type of music we need to play: a curved radius (e.g. 7,25" or 9,5") will be more suited for playing chords, since the fretboard will "accept" more easily the shape of our hand, especially when doing Barre Chords, while flatter radiuses (e.g. 15,75" or 18") will let us do easier bendings, and advanced techniques as string skipping or sweep picking.

The ideal middle ground has been introduced by Gibson and is the radius of 12", which is still the most common today (on Bass instead is often used a radius of 10"), but throught the years some manufacturer (such as the same Gibson, or Charvel and Jackson) has introduced also a compound radius that starts from 10" on the nut area (to be more "chord friendly") and progressively becomes flatter, to 16" on the other end of the neck, to let solos to have more sustain (in facts the rounder the neck, the farther the "external" strings will be from the fretboard). 

Hope this was helpful!

Become fan of this blog on Facebook! Share it and contact us to collaborate!!

HOW TO USE AUTOTUNE (free VST plugins inside)


Hello and welcome to this week's article! Today we're going to talk about how to correct the pitch of vocals, or any other instrument. These pitch correction tools are usually plugins that takes a wave sound and drag it as it was a midi sample, higher or lower on the piano roll in order to match the correct note you need. 
In the last few years the technology has been developed in order to limit the inevitable degradation of a sound that is pitch shifted, especially when applied the vocal parts, which are the ones where the pitch correction is more noticed: today the pitch correction is blended with the introduction of a synth line almost inaudible right below the vocal, in order to help it to sound more "in tune". 


Obviously the pitch correction part should be seen as a "last resort", to use only if you notice, before starting the mixing phase, that there are some errors that cannot be recorded again, but that at the same time are too big to not be noticed, and that risk to ruin the song.
First off let's say that auto tuning tools works fine only with clean, monophonic sounds: any kind of background noise, or rasp vocals, or distorted sound may be misinterpreted by the algorithm and lead to mistakes. It's also suggestable to process the vocal parts without sibilant letters (s), and the guitar - bass parts where there are no slides-bendings.

There are two types of autotuning tools:

1) Automated Pitch Correctors: These are the kind of tools, such as Antares Autotune, or the free Gsnap and Kerovee, where you can choose the key of the song and other parameters, and let the plugin to automatically slide the wave on the piano roll, in order to match in real time the scale used on the song. It's a good thing not to leave it activated for the whole song, but to Automate it in order to be switched on only when needed, and turned off when unnecessary. It is also possible to create a MIDI track and route the plugin on it in order to manually decide the pitch as it was a regular synth, in facts today the industry standard is using Autotune manually, line by line, in Graphic Mode.

2) Pre - Scanning Pitch Correctors: These plugins, such as Waves Tune and Celemony Melodyne, works by pre-scanning the track and creating a "MIDI-like" version of the track itself inside their interface, so that you can use real-time autotuning (like an automated pitch corrector), or correct the pitch manually without creating an external midi track. Offline working (which means "not in real time") takes more time and efforts, but usually leads to a better result, since it leaves to you the decision of which single syllable (or even part of it) to be processed and which not. With the best Pre - Scanning pitch correctors, such as Melodyne, it's also possible to modify the single notes of a chord of an Acoustic Guitar, for example, just like a Midi file.


The famous/infamous "Cher effect" present on the song "Believe" has been obtained by forcing the vocals through wrong scales, or manually writing notes for the voice in order create that unnatural-sounding "glitch" (obviously in this case it has been an arrangement choice, but sometimes it's just a pure error).

In conclusion, regardless to the kind of plugin you may choose, autotuning should be used with extreme caution, only when impossible to record again, and only for the single parts that really needs it, since often is better to hear a more natural interpretation, although not perfectly in tune, than the "Midi-sounding" voice that sometimes can be heard, even on commercial songs. The risk is to have a completely flattened and lifeless voice, altough perfectly in tune :)

Become fan of this blog on Facebook! Share it and contact us to collaborate!!

HOW TO CHANGE GUITAR / BASS STRINGS (a guide for dummies)


Hello and welcome to this week's article!
Today we are going to talk about how to change your guitar / bass strings. Last week we have already seen how to remove the old strings, on our article about how to clean your guitar / bass, now we must take on to the next step: installing the new strings.
The first thing to think about is the strings gauge: the thicker our strings are, the easier we can achieve lower tunings without having them too flabby and out of tune. For example if you are used to have the gauge of your thinnest string (usually the "high E") .009, with the guitar tuned in E, you might want to use a .010 to tune your guitar in D, a .011 to tune it in C and so on, to keep it in tune and with the right string tension.
There are many string producers around, the most famous of which are Ernie Ball, D'Addario and Elixir; these last ones features a specific coating to protect them against the hands sweat and dirt, therefore prolonging their life.

- To install the new strings on a Guitar, pass them through the tailpiece (according to the kind of bridge, wheter it's tune o matic, a floyd rose, a Gibraltar...) and then insert the string on the nut and the tuning post, but not at the full tension: place your hand between the string and the fretboard, perpendicular: the distance must be about 10cm, so that when you start winding, you can wrap the string a bit (at least three wraps) around the post before having it perfectly in tune.
Now, before starting winding, let's pass the part of the string that has passed through the tuning post under the string itself (the part before the tuning post, between the nut and the post), and then pass it again over it, in order to "lock" the string around the tuning post.
In order to wind the string faster, you can use your hand or a String Winder, anyway in in the "winding phase" just keep in mind that the string should wrap the tuning post from the bottom up, so direct the spire with your finger while winding.

- In order to change the strings on a Bass, instead, you can use the same method, but you can't lock the string on the tuning post, so just create an angle on the string and make it pass through the post, then wind it DOWNWARD (on the guitar we've seen it's better to do it upwards), until it reaches the right tuning.

After the new strings are mounted and tuned, we can remove the exceeding part of the string from the tuning post, using a sharp pair of cutters.

Become fan of this blog on Facebook! Share it and contact us to collaborate!!

HOW TO CLEAN UP A GUITAR / BASS (a guide for dummies)


Hello and welcome to this week's article! Today we're going to talk about how to take care of the cleaning of a guitar or a bass!
We must start by lowering the strings tuning until they are completely loose, so we can cut them without risking to have a whiplash on our face (which is painful), then we can cut them with a pair of cutters at the height of the pickups and remove them. Especially for bass, you can save the strings instead of cutting them, since bass strings are more expensive, so just unwind and remove them: you never know if some day they could come in handy.

Now it's time to move to frets polish, we can use a silver specific product (like fine steel wool), or the Planet Waves fret polish, which is even more specific. With the P.W. fret polish, you also have a "mask" to apply to your fretboard that has holes for the single frets, so you can rub the grit side of the sheet on the frets until they are clean like they're brand new :)
If you don't have the Planet Waves template, you can just apply some paper-duct tape on the fingerboard, to avoid ruining it while cleaning the frets.

Moving on to the cleaning of the fingerboard, it's time to use the Lemon Oil, which is a particular kind of oil suggested for guitar and bass, and it's produced by many brands, for example by Dunlop. Just apply it on the fingerboard, and then wipe it off rubbing hard with some paper.
If you have a maple fingerboard, SKIP this step, since it is not required, and may even leave some stain!

Finally, for all the painted parts of the instrument, we should use some drop of a simple liquid neutral detergent with some paper, and after we have applied it, we must make sure of wiping it off completely.

Now it's time to install the new strings!

Become fan of this blog on Facebook! Share it and contact us to collaborate!!

HOW TO CHOOSE GUITAR AMP TUBES (a guide for dummies)


Hello and welcome to this week's article! Today we're going to talk about TUBES! How to choose them? I have made many researches throught the last few years and tried many of them on my own amps, plus I've made treasure of the experience of other people I've known (for example the guys of my forum, Guitartribe, which is in italian), so today we're going to see and introduction on how to choose them, which are best suited for certain amplifiers and genres, and how to obtain the right sound.

Let's start by saying two words about vacuum tubes: A vacuum tube consists of two or more electrodes in a vacuum inside an airtight enclosure, and these electrodes are attached to leads which pass through the envelope via an airtight seal. On most tubes, the leads, in the form of pins, plug into a tube socket for easy replacement of the tube (tubes were by far the most common cause of failure in electronic equipment, and consumers were expected to be able to replace tubes themselves).
Tube-based electric guitar amplifiers are also preferred to solid state or digital ones by many guitarists, because in this application users are not seeking the most accurate reproduction of an original sound, but rather for the equipment to add its own characteristics. The sound produced by a tube power amplifier when overdriven has defined the texture of some genres of music, starting from classic rock and blues, and spanning through all the music spectrum. Rather than the hard clipping characteristic of solid state power amplifiers, a tube amplifier and output transformer produces audibly different and distinctive distortion. Guitarists often cite the sound of tube amplifiers for the "warmth" of their tone and the natural compression and eq cut that results when overdriven (as guitar amplifiers routinely are).  (Wikipedia).

First off let's give some general advice: If you want to replace Power tubes on your amp, after the replacement you should adjust the Bias (or have it adjusted by someone who can do it without risking his life), in order to use it at their best and avoid to ruin your power amp. If you want to learn more about how to set the bias, check out This Page. Preamp tubes instead cannot be biased or adjusted, you can just replace them. Also you don't need to use (except for exceptional cases) preamplifier tubes of the same brand, you can use a different brand for each position, if you wish. 
A low gain amp cannot be turned to a hi gain beast just by replacing tubes, although the tube that you put in the first position may  change a bit the general sound of your preamplifier: a 12AT7 will make it more dynamic, a 12AX7 will make it more overdriven and gainy, a 5751 will make it cleaner, and a preamp tube will last more or less 2 or 3 sets of power tubes.

Now, according to the Tube Town Map, we can give some general advice in choosing the right tubes for your amplifier, keeping in mind that obviously these are not rules (and many more tubes than these, which are just the most common), so the only real way to choose the right tube for you is to do some test.

Preamp tubes (sorted by music style, these are the most commonly found on online stores, at a reasonable price):

Acoustics - Clean guitars: Electro Harmonics 12AY7, GE 5751, Fender 12AT7

Blues - Classic rock: JJ 12AX7, TTE 83CC, Mesa Boogie 12AX7

Grunge - Classic metal: TT 12AX7, Tung Sol 12AX67, JJ ECC83S

Thrash Metal  - Extreme metal:  SOVTEK 12AX7LPS, JJ ECC83S, TT 12AX7


(And here are some of the most sought-after, rare/boutique/vintage):


GE 12AX7WA: clean, dark sound.

GE JAN 5751: 30% lower gain than a 12AX7, bright sound.

RCA 12AX7A: hi gain, american fat sound, good for crunch

RCA 7025: lower gain, very good for clean tones.

RAYTEON 12AX7: lower gain, enhanced higher frequencies, great dynamics.

MULLARD 12AX7/ECC83 modern/old logo:  hi gain, enhanced mid frequencies, suggested for british amps (beware of the price!).

BRIMAR 12AX7: similiar to the Mullard, but slighly less gainy.

TELEFUNKEN ECC83: high definition, bright sound, less gainy than a Mullard. Very expensive!

TUNGSRAM ECC83: Balanced sound, enhanced mid-lows,high definition, high headroom.

RFT ECC83: strong lower frequencies and good for crunch, lower headroom and break up level, suggested for blues.

TESLA ECC83S: good amount of gain, suggested for british sounding amps.


Power tubes (sorted by type)

EL84: JJ EL84 for a Standard sound, Sovtek / Electro Harmonix for an all around tone, JJ EL844 For a tight, low power sound.

EL34: JJ EL34, Electro Harmonix EL34 for a sound ranging from blues to hard rock, TT EL34 and Tung Sol EL34 for Heavy Metal, SED EL34 for dropped tuning and Bass.

6L6: JJ 6L6 and TT KT66 for a sound ranging from blues to hard rock, TT 6L6, Tung Sol 6L6, Sovtek 6L6 WXT+ for heavier tones up to the extreme metal, and SED 6L6 for dropped tunings and bass.
JJ 6V6 are lower power tubes, which leads to a lower output and a softer overdrive.

KT88 / 6550: JJ KT88, are basically good for every genere, Electro Harmonix KT88 are suggested for Bass amps, while SED KT88 are rich of lower frequencies.

Have fun trying all of the combinations!!

Become fan of this blog on Facebook! Share it and contact us to collaborate!!

HOW TO USE THE TRANSIENT DESIGNER / SHAPER / ENVELOPER (free Vst Plugins inside)


Transient designers (also known as "Transient Shapers" or "Envelopers") are sound processors that stands somewhere between equalizers and compressors, but the aim of T.D.s is to affect only the Attack and Sustain phase of a sound, so these effects are capable of enhancing or attenuating each of these with precise accuracy. For instance, using a transient designer we’re able to increase the attack of a snare sound or even reduce the sustain of a drum loop, in order to reduce the room sound in the recording.
These results can be achieved with other methods too, for example using an Equalizer, but the characteristic of Transient Designers is to leave the "core of the sound" unaffected and only process attack and sustain, which is quite hard to obtain with other methods.
First off lest's start saying that some of todays best DAWs already features an in-bundle Transient Designer, but here is our suggestion for the best free Vst  T.Ds: FLUX BitterSweet II, DigitalFish Dominion, Storm Transient Designer (this is mono). For an interesting example of how this kind of plugin works, check out the audio samples of the Native Instruments Transient Master, that can be found Here.

Here are the most common and fundamental controls featured on Transient Designers:

- Attack: With this control you can increase the punch of the initial part of the sound (for example the pick of a bass, the strum of a guitar to make it more "chimey", or the attack of a drum sound), or lower it to make it softer and less "in your face". This function adds or subtracts decibels like an equalizer, boosting or cutting the amplitude of the first part of the sound.

- Sustain: This control affects the "tail" of the sound, and is mainly used to remove (or increase) the room reverb for example on drums, vocals or acoustic guitars. The sustain control is useful to get the sound closer or farther away from the listener, increasing or decreasing the sustain as it works with a compressor. The nice thing with Transient Designers is that you can work of the sustain of a sound without compressing the sound itself and leaving it more natural.

- Gain: There is really not much to say about this control, other that is used to lower the volume of the sound when needed, especially when increasing the attack: the volume of the signal will be increased, so it’s well worth lowering the output level of the plug-in to avoid clipping.

Transient Designers are used also for creative results, like shaping the sound of a Synth (for example making it less aggressive) or adding space (or removing it) from a whole mix during the Mastering Phase. Let us know if you have some other interesting use of this kind of processor to suggest!

Become fan of this blog on Facebook! Share it and contact us to collaborate!!

HOW TO USE SIDECHAIN COMPRESSION (free Vst Plugins included)


Hello and welcome to this week's article! Today we're going to talk about an advanced compression technique called "Sidechain Compression", which is widely used in productions that span from extreme metal music to dubstep. To take a look to the Basics of Compression, CLICK HERE.

Sidechain Compression is a technique that consinsts into putting a compressor on a sound (usually the kick), that when is triggered, it applies the compression on another sound (usually the bass, or the synth on dance music), instead of affecting the kick itself;
the aim is to obtain a "pumping" drum sound, almost as the bass is part of the release of the kick itself (therefore largely increasing the groove), and avoids at the same time certain frequencies of the bass to cover the same frequencies of the drum kick, leaving it as much clear and audible as possible.
Let's focus on its most common use, for rock-heavy metal music, and once you've learned how it works, you can try it on more creative ways.

First off, grab a vst compressor that supports sidechaining, Here is a List of Free Sidechain Compressors, and among them I obviously suggest the ReaComp; many DAWs, anyways, already have an "in bundle" compressor that supports sidechaining.

Now load the compressor on your Bass track and activate the "sidechain" control (for example, in Nuendo, it's an orange button on the top left of the effect window, if you lay the cursor on it without clicking it will say "Activate Side-Chain"). Once this control is active, open the kick track and find the "Audio Sends" menu. By clicking on one of the empty slots, it will make you choose the buss where to send your Input, and choose "Sidechains - Reacomp", or whatever  is the compressor you've loaded on your bass track. After you chose, set the "Send Level" to 0.00 db.
Now, by playing the two tracks together, you will notice how the kick will cut through the bass sound much clearer, and the more you will lower the "Threshold" control, the more the bass volume will be lowered when the compressor activates (the ideal would be that when the kick hits, the bass is lowered of around -7db).
The attack time should be set pretty fast, according to the music genre, and so the release time, that may vary orientatively from 250ms to 500.

Become fan of this blog on Facebook! Share it and contact us to collaborate!!

HOW TO MIX A GOOD ROCK / METAL BASS (free Vst Plugins included)


Hi everyone! Today we're gonna talk about how to get a good rock-metal bass sound, and how to find its place on the mix, which is one of the hardest things to get; often, in facts, bass tends to disappear, covered by the lower frequencies of the guitars, or to be too loud, making the mix muddy. Our aim should be to find a place where to place where to set the bass, avoiding to make it fight with the other instruments, and if we'll succeed, we will obtain a much more glued and punchy mix.

Let's get started!

First off you obviously need a decent bass, and an audio interface of any kind, in order to get the signal to your daw. Don't use "the mic in" of the integrated sound card that comes in bundle with the pc, because the sound will be awful :)
You can help yourself by tweaking with the bass knobs until you find a good starting sound, then you can record your track, making sure that the signal isn't too high nor too low. If it's too high, it will distort/cut frequencies, if it's too low, you will have to raise the volume later, raising the noise too, and obtaining a high-volume weak sound.

Now there are two ways to proceed:

1. Single track: first, to give punch to the sound, use a bass overdrive-preamp simulator, like the TS-B.O.D. which is a great freeware vst that simulates the legendary Sansamp Bass Driver, then you can add a Compressor, with a fast attack (tending to zero), a longer response time (250 ms), a -30db threshold and a ratio that may go from 10:1 to 20:1, to infinite:1, according to how steady is your hand :)
After that, is time for the Equalizer, which may vary strongly from mix to mix.
My general suggeston anyway is to filter everything below 40/50hz with a high pass filter, and above 7000hz (cut even more, if you thing you don't need so many highs) with a low pass, then you can scoop-subtract some more frequencies (but not too much) on the 2/3khz area to leave some more room to vocals, and boost around 80/100hz to give to the track some more low-end.
In order to reduce boxiness we can also cut between 180 and 250hz.
So this bass chain is: OVERDRIVE->COMPRESSION->EQUALIZER

2. Dual track: this method is a little more tricky, but should give you a more extreme distortion, while keeping the same punchy lows, at the same time.
First, take the unprocessed track you've just recorded and duplicate it, then the first copy and compress it like on the first method, then add the equalizer, filter everything below 40/50hz with a high pass filter, and above 7000hz with a low pass one, and cut (9 or 10db) a bit around 500hz, with a small Q (so a wide range of frequencies affected). Then take the second track and add a distortion on the vst chain (for example, the good RONALD PASSION BASS PREAMP, or Ignite Amps - SHB-1, a Tube Bass amp suited for Rock and Metal, or AcmeBarGig - BIG, another interesting Bass Amp Sim), crank it really high, making it sound almost like a guitar (ALMOST, not TOTALLY, we'll need this track only for the grit), and add an equalizer, setting a low pass filter above 4500khz more or less (you choose the curve), and a high pass below 500hz, just to keep the growl. Finally, mix the two sounds, finding the right amount of volume to obtain a good, tight and defined low, end and some crunchy mid-highs.
So the chain with this method is:


T.1 COMPRESSOR->EQUALIZER 
T.2 DISTORTION->EQUALIZER 

Sometimes it's also a good idea to put a LIMITER at the end of the chain, not to squeeze the sound (for this task we have already used a Compressor) but just to set a threshold, to make sure the bass will stay on its place and will not consume headroom later, on the Mixing and the Mastering phase.

Become fan of this blog on Facebook! Share it and contact us to collaborate!!

One Big Gadget

image

CellPhones & Accessories

A premium Android-powered smartphone, the Samsung Epic 4G Touch for Sprint may be designed to supply the best multilayered entertainment experience thanks to the superior speed and display innovation. Powered by one in the fastest processors on the market–the new 1.2 GHz dual-core Samsung Exynos, the Epic 4G Touch runs on Sprint’s ultra-fast 4G network..

image

Cameras & Photo

Die kompakte, leichte, 18 Megapixel starke EOS 600D ist eine digitale Spiegelreflexkamera mit dreh- und schwenkbarem Monitor für aufregende, interessante und kreative Aufnahmen auf unglaublich leichte Art, eine ideale Wahl für ambitionierte Hobbyfotografen, die Wert auf Bildqualität und Komfort legen. Sie bietet praktisch alles, was man für gelungene Fotos und HD-Movies braucht..

Find the best Gadget

Find the best latest tech product at One Big Gadget.

Cell phones, desktops, digital cameras, laptops, mp3 players, tv, ipod, e-book readers, camcorders, printers, software, games, car tech, speakers, remote controls, blu-ray, office gadgets, gps, watches, toys, portable devices, kindle fire...etc

Featured Section

image 3

BlackBerry PlayBook Tablet

Freu dich auf das erste professionelle Tablet der Welt. Das BlackBerry® PlayBook™ bietet dir ein Tablet-Erlebnis ohne Kompromisse. Multitasking, megaschnell, Flash-fähig und extrem handlich. Dein BlackBerry® Smartphone kannst du über BlackBerry® Bridge™ bequem mit dem Tablet verbinden und über den hochauflösenden Bildschirm kannst du sicher auf E-Mail, BBM™, Kalender, Adressbuch und weitere Funktionen zugreifen. Entscheide dich für das Tablet, das alles kann – und noch mehr...